
Saturday, December 27, 2014
Two Minute (NO ICE CREAM MACHINE) Raspberry Sorbet
 Since we don't own an ice cream machine, I decided to make a sorbet with frozen raspberries. We are kind of a little lazy to be making a custard and all that extra stuff, so a sorbet seemed like a good way to cool down and have a refreshing, palate-cleansing dessert.
 Using just three ingredients, we hope you'll love this quick-frozen treat!
Here's our method:
1. Freeze a bunch of raspberries (probably 2 cups).
2. Pulse the raspberries in a blender/food processor (we used a blender) with granulated sugar (add sugar according to preference). We didn't measure our sugar nor did we add much because our raspberries were pretty sweet.
3. Add a dash of water to bind the mixture and pulse again until a sorbet consistency is reached.
* Be super careful with how much water you add because the sorbet can become too watery. Luckily, we got this on our first try.
Hope you enjoy!
* Be super careful with how much water you add because the sorbet can become too watery. Luckily, we got this on our first try.
Hope you enjoy!
Tuesday, December 23, 2014
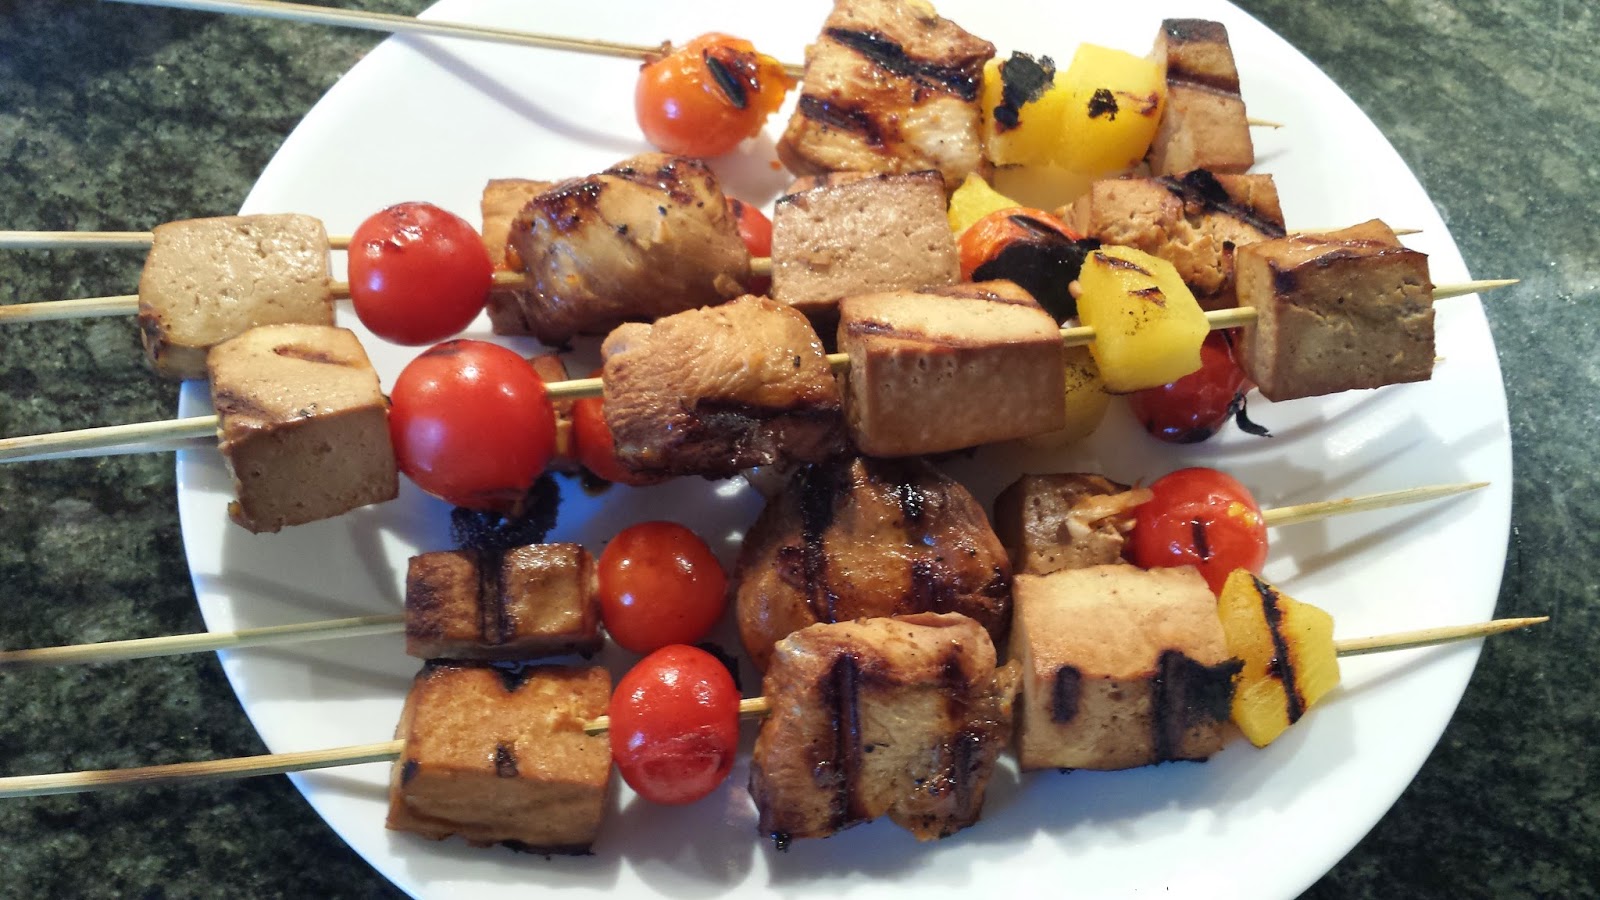
Grilled Mushroom with Cherry Tomatoes

1. Remove the mushroom stalk
2. Lay the mushroom upside down on a hot griller
3. Salt and pepper the mushroom cavity lightly
4. Remove the mushroom carefully, not to spill, once mushroom juice starts to appear
5. Grill the cherry tomatoes at the same time, and remove in about 3 minutes or as you like
6. You are done!
Fish Soup
Fish soup does not create excitement in a dining table. However, fish soup has been proven to lower ones high blood sugar down to 30 milligram per deciliter. Cholesterol and high blood pressure, maybe. And if you're on a diet, of course!
Fish soup are prepared in so many ways, for example, the Miso Soup.
Here is another way of making your fish soup, different than the norm: brew a fish stock.
1. Cut the fish head and tail and add them to a pan.
2. Add water enough to cover the fish head and tail.
3. Add ginger, enough to season
4. Let it boil, once boiling, reduce the heat and let it simmer for about 45 minutes.
5. Remove the head and tail and discard.
6. This is your fish stock. Place this in your refrigerator or freezer for future use, or you may use it right away.
Moving forward, you can add most vegetables to your fish stock. For example:
1. Onion bulb chopped in quarters
2. Bookchoy, petchay, cabbage and other greens, to your liking
3. Beans, any kind, green beans is good
4. Green onion leaves, chopped finely
5. etc. imaginable
Tuesday, December 2, 2014
Quick Bruschetta

Quick, easy, and tasty! We love making this.
Ingredients:
- Parsley (I couldn't find cilantro so I substituted for Parsley)
- Tomatoes (any), Mozzarella
- French Bread (any)
- Olive Oil
- Salt, Pepper for seasoning
Here's what we did:
- Preheat your oven to 350 F
- Slice the bread, tomatoes, parsley leaves, and cheese
- Assemble by sprinkling the bread slices with olive oil, tomato, mozzarella, then parsley for garnish. Salt and pepper.
- Warm bruschetta for about 5-10 minutes or so, depending on how crunchy you like your bread. This can be served hot or cold.
Monday, December 1, 2014
Peppered Seared Tuna
 This is SUPER EASY. My inspiration came from eating at Lemonade in Ventura Blvd. I looked at their seared ahi tuna and was instantly inspired, thinking yes I can make that as well (although I didn't try their version because I felt I could make my own--which I did).
Here's how I made mine:
1. Season both sides of your tuna with pepper (heavily) and a dash of salt.
2. To a scorching hot skillet with 2 tablespoons of olive oil, place your tuna gently. Watch the sides of the tuna. As one side turns white, flip the tuna over to sear the other side as well. I made mine almost sashimi-like (raw fish). For those that don't like the rawness, keep cooking the sides until you get a good layer of white on both sides, which really depends on preference.
Enjoy!
It's Always Boba Time!
One day I was walking around an Asian grocery store. As I searched for different ingredients, I found dried tapioca balls aka boba or bubble (however you call it, it's tapioca balls). I thought to myself, why buy boba when you can make your own and play around with different flavors! Here's how I stumbled upon making my own hazelnut thai iced tea with boba:
First, this is how dried boba looks like; it's all shriveled up and tiny!

 |
| 1. I made a good amount of thai tea. I didn't measure this. Instead, I just eyeballed the tea leaves and water. I made sure the thai tea color is a dark shade of brown (like the picture above). |
 |
| 2. In a separate pot of water, add in the boba (the boba is still very frozen so make sure you thaw it out to make it easier on yourself--I ended up chopping up the boba and had a block of boba in my pot until it dissolved into many pieces). I overestimated the amount of boba I wanted to use, but as they say "the more the merrier." I didn't read the instructions on the boba bag and used my judgement to how I wanted to make the boba. I added a good amount of sugar in the pot of water with the boba. It will turn into that dark sugar syrup you see when you order boba drinks. My water to boba ratio notes: Boba will absorb the water and sugar, so if you are eyeballing as I did, I added enough water so that there is approx. 2 inches of water above the boba. Boil (low) the boba for about 20 minutes, stir occasionally to keep from scorching and help separate the boba pieces as it breaks down. 3. The final step. Combining the ingredients: Use a spoon with holes to strain the boba unless you want some of the syrup. Pour boba into a cup. To your cup, add in the thai tea (you can make this hot or cold--for my picture below I made ice tea), then hazelnut creamer or french vanilla, half and half, milk, cream, whatever your preference. I should also mention that depending on your preference of tea is how you should add more or less of milk or tea. |
 |
| And here it is, my boba drink! |
Tuesday, August 5, 2014
Asparagus wrapped with Prosciutto
Super amazing, delicious, yet so easy and quick to prepare. Guaranteed to Wow your guests for an enchanted evening, if you will....
Ingredients:
1. Asparagus - wash and cut the ends
2. Prosciutto
3. Virgin Olive Oil
 The work:
1. Bunch the asparagus in fours, and wrap them in the middle with a piece of prosciutto
2. Heat the oven 350 deg.
3. Lay the asparagus/prosciutto in a metallic dish pan
4. Lightly drizzle the pan and the ingredients with the oil
5. Put the pan into the oven and bake it for 15 mins.
7. That's all to it--enjoy!
To add pizzaz: You may serve it with fresh olives and, of course, with a dry red wine , perhaps?


Ingredients:
1. Asparagus - wash and cut the ends
2. Prosciutto
3. Virgin Olive Oil
1. Bunch the asparagus in fours, and wrap them in the middle with a piece of prosciutto
2. Heat the oven 350 deg.
3. Lay the asparagus/prosciutto in a metallic dish pan
4. Lightly drizzle the pan and the ingredients with the oil
5. Put the pan into the oven and bake it for 15 mins.
7. That's all to it--enjoy!
To add pizzaz: You may serve it with fresh olives and, of course, with a dry red wine , perhaps?
Friday, June 20, 2014
Saturday, June 14, 2014
Sunday, June 8, 2014
Fish Fillet Salad
This is a delicacy in Asia, particularly in the Philippines, in places along the sea, where fish are fresh. Known as "kinilaw" it is similar to "ceviche" and "sashimi". It is a fresh fish seasoned with vinegar, sea salt and garnished with fresh vegetables.
Ingredients:
1. Fish--we have silver fish for this recipe. Filleted tuna or salmon cut in cubes are excellent
2. Lemon or lime
3. Onion bulb or/and onion with leaves (chopped crosswise)
4. Sea salt
5. Ginger, chopped
6. Hot pepper; Jalopino, chopped
7. Tomatoes; cherry tomatoes, chopped
8. Cilantro, peppermint, spearmint or basil may be added as desired
9. Vinegar, either coconut or apple cider
The work:
1.Mixed all ingredients in a bowl--season to taste
2. Cover the bowl and refrigerate for at least 30 minutes
3. Best if served with ice-cold soda, beer or dry white wine. Enjoy!
Friday, June 6, 2014
Fried Brown Rice "Fried Rice in the Valley"
As good as it gets, Brown Rice is it! Healthy, fibers abound, it is rice at best; it is filling too. Just perfect for those weight- watchers, and health conscious fashionistas...just like you (?)
Here's how:
1. Cook brown rice as you normally do with white rice.
(just enough not to cook soggy).
Additional ingredients:
1. String beans--cut about two inches-- enough for your cooking size
2. Oyster sauce or stir fry sauce -- enough to taste
3. Roasted peanuts-- from the can -- enough to add texture
4. Salt and seasoning, optional, to taste
5. Onions, garlic
6. Dried cranberry or raisins
The work.
1. Heat wok or any large pan, as a 17" cast iron skillet.
2. Add garlic and onion and stir it for one minute
3. Add string beans and stir
4. Add the cooked brown rice, stir
5. Add peanuts and dried cranberry or raises
6. Add oyster sauce, stir until thoroughly mixed
7. Continue stirring and cook for about three minutes
8. You're done
Thursday, June 5, 2014
How To Make Your Cooking Taste Better?
1. Just cook enough--as in economics, supply glut is bad business. Cook small portions and make everyone crave for more.
2. Cook when hungry (?) Chances are, you'll cook better when you are craving. Craving prompts that delicious imagination in us.
3. Use appropriately sized cookware. It is better to use bigger cookware that allows mixing ingredients easier.
4. Maintain a clean and ample space for food preparation.
5. No matter what, salt makes your cooking tastier. Use more seasonings, to compensate salt, should you want it reduced.
6. Use fresh ingredients. Dehydrated seasonings are okay, but do not use wilted veggies. Remember, it is the crunchiness in vigies that make them delicious.
7. Use good quality meat or fish. They are tender, juicy, and cook faster.
8. Use as few utensils and cookware. Don't let the worry of cleaning ruin the taste of your delicious cooking. (1Pancook only uses 1 pan for most of her cooking.) Remember, the syntax is, cook a little, enjoy and relax better.
9. Eat in a clean, clear table--no clutter. Things that don't belong to a dining table should not be on the table. Candle for an elegant candle lit dinner is a welcome, however.
10. Make your cooking stand with wine. After all, you just don't want to get full, but to enjoy as well.
Wednesday, June 4, 2014
Fish Steak
I got this from my Mom...guaranteed to Wow your palate!
This is a 15-minute dish...so easy, yet so delicious.
Ingredients:
1. Any Fish (skinless or with skin--I use salmon fillet from Costco)
2. Soy sauce
3. Lemon
4. Ground pepper to taste
5. Onion bulb, cut in rings
6. Flour
The work:
1. Coat pan thinly with oil, just to ensure fish won't stick.
2. Cook fish, medium heat, six minutes on each side, or until cook. Then remove and place it on a platter.
3. Stir fry the onion. Remove once they separate, and place the onion rings on top of the fish.
4. Pour enough soy sauce and lemon (enough to your taste) into the pan. This would be the sauce.
4. Add ground pepper, and enough flour to the mixture, and stir for consistency.
5. Remove the sauce when it boils (about two minutes), it would be syrupy. Pour it onto the fish.
6. You may add celantro, mint or rosemary. That's it...
Tuesday, June 3, 2014
Easy Barbecue
 We need a good marinade to marinate a tender meat for a delicious, juicy barbecue. This is rather subjective as people have their own preference. People tend to stick to the taste that they have grown with. Most, if not all, prided their own way.
Anyways, if you are adventurous and open, try this:
1. Prepare marinade
A. Mix coconut vinegar or apple cider vinegar with soy sauce to taste.
B. Add chopped garlic, enough to season
C. Add seasoning (parsley, rosemary, etc.) of your liking, enough to seasons
D. You may add sugar, if you desire
E. Add ground pepper to taste.
2. Marinate meat with the prepared marinade. Massage and prick meat with a fork to induce marinade into the meat. Place the marinated meat inside the refrigerator, preferably for two hours.
3. You may grill the marinated meat over kitchen cook top on a cast iron griller for six minutes each side. Baste meat with olive oil when the meat is about to cook.
Cooking Eggplant
Eggplant could be chopped crosswise and stir fried. Eggplant could be chopped and added to soup.
But the best is coming from the grill--from a charcoal grill. Then you could fry it with eggs, or make a salad with other vegetables, seasoned with vinegar and seasoned to taste.
But the dilemma is, how to grill an eggplant indoor? We have experimented for quite sometimes, and this is by far the best.
1. Grill the eggplant on top of your kitchen cooktop with a cast iron grill.
2. Place the eggplant on an aluminum tray or cast iron grill, and place it in the middle tier in the oven, and roast it for 30 minutes @ 450 deg F.
And don't forget: You need to prick the eggplant to avoid bursting, and, at least turn them once for even cooking.
Should We Measure Our Ingredients?
Measuring ingredients is tedious, and we hate it! Could be the reason on why people don't like to cook, or don't even try!
When just starting, maybe, yes--just feeling the waters. Subsequently, cooking is just pure fun. It is about imagination, experimentation, and never giving up.
Furthermore, stay away from frying. The hot oil splatters are terrifying and oops fattening!
Enjoy ;-)
When just starting, maybe, yes--just feeling the waters. Subsequently, cooking is just pure fun. It is about imagination, experimentation, and never giving up.
Furthermore, stay away from frying. The hot oil splatters are terrifying and oops fattening!
Enjoy ;-)
Monday, June 2, 2014
For the Love of Mint
After taste? Or cravings for sweets after meals? Try mint it is zero calories--that's right.
Mint would surely gives that minty flavor to ones delight. Mint added as a food seasoning, or to a glass of iced water is simply refreshing. It would make vodka, saki, whiskey taste even better. I personally feel that there is some elegance in it, as well.
We like peppermint, spearmint, Basel and rosemary. They are so good! They are easy to grow with minimum care. It is fascinating to pick their minty leaves--fresh from the garden straight to dinning table!
We grow ours in our yard, some on pots and some on an elevated planters. They are sweet smelling and adorable plants.
Understanding Cast Iron Grill and Pan
Aside from being heavy, cast iron utensils are best. Simply best.
1. It is very versatile. A pan would even grill perfect, in addition to normal frying, sautéing, deep frying, and stir frying.
2. A griller with grated and flat cooking surface is great. The flat surface cooks sunny side up and bacon easy. The grated side provides impeccable grill marks on your steak. And, simply put,
3. Very sturdy and lasts for generations.
Why are these grill and pan not famous, if they are that great? They are cheap, maybe (?).
Like the Aspirin, it is not rare that good things are sometimes taken for granted. In cast iron, you just got to be tired of it...they are guaranteed to outlast all else. They are rugged and indestructible!
These are what you need:
1. Season your cast iron pan and grill before and after use with oil. The light oil deposit coats the cooking surface to prevent food from sticking.
2. Clean your cooking utensils with water only. A brush with a plastic scraper at the back of the brush head is a perfect tool for cleaning and scraping hard deposits.
3. Heat the cast iron cookware for about four minutes. These would prepare the surface for clean, stick-free and even cooking.
Thursday, May 29, 2014
Cast Iron Skillet
A 17" cast iron skillet is a kitchen must. It is the most versatile, the hardiest working tool of the trade. Season it well and it will cook food for your family for generations. A typical 17" would cost you about $40.00.
The skillet could be used in/on:
1. Cooktops
2. Grill, charcoal/gas
3. Inside an oven
It could be used to cook, sauté, grill, bake, roast, fry all kinds of food.
Cleaning is easy. You only need to wash using brush and water. Detergent not needed. Season the skillet with oil spray or vegetable oil. Wipe excess off. Rugged and cheap, this is the best of them all.
All About Wine
What wine to pair? How to Choose, which Wine for What?
One thing and foremost, people drink wine because of its spirit. Makes us happy and feeling easy, of course, in moderation.
I would say, choose a dry wine. And you'll never be wrong. White or red would pair fine with either meat or fish, so with chocolates, fruits, veggies, cheeses, etc.
Expensive wine feels good to drink. But I haven't felt any significant difference with cheap wine-- specially after the first glass. Pocket wise the balance tilts to cheap wine.
Enjoy to your hearts desire! Explore, what wine enthusiasts say, might not be always true to you. Be your own expert and enjoy each sip!
Indoor Grilling
Grilling is thought to be an outdoor activity.
But actually we could grill anything (meat, veggies, fish, tofu and fruits) on top of our kitchen cooktop.
Yes, the fun is not an outdoor feeling, but all else is the same--even better, it's faster, easy control, no sweat. And the sear marks are spectacular!
We only need a griller. Cast iron griller is best. Season griller with oil spray and pre-heat, medium-high, for four minutes on top of cooktop. Then place prepared meat, fish , etc. on top of the griller.
A seasoned salmon fillet, T-bone will cook in 12 minutes (6 minutes each side).
And if you crave for a wood smoke flavor, do so. Wood smoke flavoring (ex., cedar flavor) are available in groceries. Smoke wood flakes could also be sprinkled on the griller to create the desired flavoring.
About cast iron griller: Super sturdy, will last for generations. Easy care, easy clean--no detergent needed, just wash with water and scrub brush. Spray with oil spray before and after use and after washing.
Friday, May 23, 2014
Fun Idea: Iced Mint Leaf in Sake (or whatever drink desired)

Enjoy :)
Tuna Macaroni Salad
Sort of like my previous post, this tuna salad is essentially like my last tuna salad with the exception of macaroni and dried cranberry! First, I cooked the macaroni (9 minutes in salted boiling water). After the I drained and cooled the macaroni, I mixed mayo, chopped celery, carrots, a bit of dried cranberry, and canned tuna together. I then chilled my salad to let the flavors sink in before serving.
Enjoy!

Thursday, May 22, 2014
Clams in Wine

Ingredients:
1. Clams
2. Garlic, minced, two cloves would be enough
2. Shallot, chopped, enough to season
3. Ginger, chopped, enough to season
4. Ground pepper, enough to season
5. Mint, rosemary, or other seasoning of your liking
6. Salt, enough to taste
7. Olive oil, just enough
The work:
1. Clean the clams with water
2. Coat pan with olive oil, and heat for at least 2 minute--medium heat
3. Throw in seasoning. When it start smelling good follow the
4. Clams
5. After 10 minutes the clams should be opening, add olive oil and salt to taste.
6. End of work, enjoy!
Taste better when added with white wine along with the olive oil. And a lot better when dined with dry white wine!
Planked Salmon
 The original broiler planking. Set oven tray in the middle tier. Set to broil 450 deg. F. Wet the plank well, and let it sit inside the oven for five minutes (this would make the plank emit its natural wood flavor--in our case it's cedar). We used cedar plank bought from Costco, or you could buy it from Amazon.
Ingredients:
1. Salmon fillet (skinless or with skin)
2. Salt to taste (not needed if capers is used)
3. Pepper, ground, as desired
4. Garlic, powder, as desired
Preparation:
Season salmon fillet with the rest of ingredients and place on top of the maple plank and continue broiling for 30 minutes @ 450 deg. F. You are done!
How to serve:
Serve the grilled salmon on its grilling plank. You may top with capers or ringed onion. Fresh peppermint or basil leaves with a glass of dry white wine should simply seal this favorite.
Attention: Check your cooking accordingly, paying especial attention to the cedar plank.
Poached Egg Pt.2 (No Vinegar)
I've been trying to find the best method for me to poach an egg, and this time I got it. Here is what I did: Crack an egg in boiling water and once the egg cooks, lower the heat to low. I didn't add vinegar. It seemed unnecessary because I noticed the egg starting to cook regardless. You'll notice the egg cook once the yolk looks like the picture below. I don't remember the exact time it took to poach the egg, but it was fairly quick. Simply keep an eye on the egg.
This is all trial & error. Have fun!

Black Sesame Ice Cream
Okay, I didn't make this (I wish I did), but this was too GOOD! I just had to post about it. And to save some calories, I used a little shot glass for one scoop. Cute idea.. RIGHT? ;)

Quick Tuna Salad
Quick, simple, tasty--just the way we like it! Here is what we did: simply mix all the ingredients of shredded carrots, chopped celery, canned tuna, and mayo together! I didn't season this, but I'm sure it will taste better with some salt and pepper!

Thursday, May 15, 2014
Healthy Quesadilla
What we love about our version of our quesadillas is that it took 10 minutes tops!

1. Mushroom
2. Spinach
3. White Cheese
4. Corn Tortilla
Our method: Using one non-stick pan, we cooked our spinach and mushroom and let them sweat a little. Once finished, assemble quesadilla (as if you are making a sandwich--tortilla first, followed by cheese, veggies, cheese, and tortilla). Put this on grill or non-stick pan. Once the cheese melts, the quesadilla is ready to eat!


Frozen Treat: Pineapple Chunks
 I tried this out because my apple, yogurt, and banana frozen treats worked out well. The same can be said for this sample of canned pineapple chunks!
 Frozen Treat: Banana "Ice Cream"
My favorite. I had some frozen banana slices in my freezer and wanted to test this out (inspired by Dole's frozen banana dippers and Rachael Ray). What I did was simple, but a little difficult. I put my frozen banana slices in a blender and pulsed them until they got to a somewhat creamy texture. The problem was some of the banana slices were not able to completely blend so I had banana chunks in my "ice cream." Anyhow, it turned out alright and on the side, I put a dash of Nutella in one bowl and peanut butter in the other. Both tasted great!
One last thing, I suggest to eat this right away and don't put it back in the freezer. If you do put it back in the freezer, let it thaw out a little before eating.


Frozen Treat: Frozen Apple Sandwich
My reason for trying this out was to simply think of an alternative to not having to eat bread (low carb diet right?). Anyhow, this treat can be eaten fresh or it can be put in the freezer as a sort of but not really ice cream sandwich. I tried both and it tastes just as good in the freezer or fresh!
Why do I love this treat? Well, it is healthy, simple, and quick (we always go for quick, simple, and little ingredients). We used peanut butter (can also use Nutella), dried cranberries, and pistachios for the filling.


Frozen Treats: Frozen Yogurt
Instead of having ice cream or a popsicle, why not have frozen yogurt?! We had bought a ton of yogurt and didn't want it to go to waste so we stuck it in the freezer. Turns out, it is very tasty--a hybrid of ice cream and a popsicle, sort of.

This is self explanatory, and the pictures below speaks for themselves. Give it a try!

Miso Soup (None of that Instant Stuff)
 We had bought a big container of miso paste, and thought to ourselves hey why not make miso soup. Turns out it is super simple (only two basic ingredients), super quick, and of course, TASTY!
So the base for Miso Soup is Dashi (a kind of fish stock/broth) and Miso Paste. Finding Dashi was really hard for us. Sometimes, it won't be at your typical Asian Supermarket or Asian food aisle; however, if these are your only two options, we suggest the Asian Supermarket. Some grocery stores don't even know what Dashi is or let alone know that fish stock/broth exists. So, if you live in the LA/downtown area, we suggest to go to Koreatown or Little Tokyo. If not, you can always make your own fish broth. We did not, because we were able to find Dashi.
Anyhow, this is what we did:
1. Once your pot of water begins to boil add Dashi (about 1.5 tablespoon)
* Dashi looks like little pebbles. Very salty so need for any seasoning.
2. Once all of the Dashi dissolves, turn off the heat
3. Add Miso Paste (about 1 chunk tablespoon) and let it dissolve in mixture
4. Occasionally stir.
5. Once Miso Paste is mixed in, add tofu or seaweed or green onion (optional)
Wednesday, May 14, 2014
How to Make Thai Tea
The trick in this is to keep the thai tea leaves on some form of a strainer while in hot, boiling water. Do this until the water turns into a dark brown color (like the picture below).
The milk thai restaurants use is half & half.
Our thai tea tasted just like the restaurants!

Frozen Banana Treats
We love this! The picture below shows the banana slices to be uneven and not completely uniformed; however, this is because we did not slice our banana before putting it in the freezer (how silly).
This treat is super healthy and a good way to beat any cravings for ice cream, especially on a hot day! Simply, slice your banana before putting the slices in the freezer, and add toppings (any will work) but we used peanut butter and nuts/dried cranberries because we want to be healthy here! It should be noted that this treat can be stored in the freezer for weeks, and it still is great and tasty!
For more sweetness, we suggest to coat the banana with chocolate before putting it in the freezer (if you like, of course).

Wonton Appetizer: Salmon Dip Filling
This super easy appetizer is quick, yummy, and not too fattening! Most importantly, what we love about wontons are that they are super versatile in that, sweet, salty, and sour fillings can be put in them! Here are one of our treats:
 Ingredients:
Wonton Wrappers and Salmon Dip
*Salmon dip from Costco. Any cheesy dip works.
How to Assemble:
If you have the huge wonton wrappers, cut a wrapper into squares. If you have the square wrappers, then you are good to go.

Wonton Wrappers and Salmon Dip
*Salmon dip from Costco. Any cheesy dip works.
How to Assemble:
If you have the huge wonton wrappers, cut a wrapper into squares. If you have the square wrappers, then you are good to go.
For all wonton wrappers, simply put the filling in the middle of the wrapper, and fold diagonally. Lastly, dab one side of the edges with water and seal.
How to Bake:
Set oven at 350 F. Lightly spray a baking tray. Put wonton wrappers on the tray and spray them with a little oil (we used canola). The wontons are sprayed in order to get them crispy. Bake for 9-10 minutes.
These can also be deep fried, but we are trying to be healthy here so we baked ours.
Chicken Whole Wheat Spaghetti with Alfredo Sauce
A quick, easy, and simple recipe. Since we are too lazy to be making our own homemade Alfredo sauce, we chose a low-fat Alfredo sauce to use. Still, the sauce needed heating, seasoning, chicken, and veggies! Here's what we did:

1. Broccoli
2. Onion
3. Clove of Garlic
4. Chicken (a few pieces)
5. Peas
6. Choice of pasta (we used whole wheat)
Optional: carrots

How to Cook:
Cook chosen pasta. Boil pasta for 9 minutes in salted water. Set aside. Cook garlic, onion, and chicken until chicken is right about finished. Add in broccoli. Once broccoli softens, throw in peas. Add Alfredo sauce. Season with salt, pepper, and Italian seasoning. Stir occasionally for about 5 minutes so the flavors blend.
Lastly, put sauce mixture on top of pasta and enjoy!
Monday, May 12, 2014
Quick, Simple Fruit Salad
A simple but yummy fruit salad. It only needs three essential ingredients and is super versatile!
 Ingredients:
1. Canned Fruit Cocktail (drain the juice)
2. Chopped Strawberries, Pears
3. Cool Whip
4. Honey
How to Prepare: Drain out the fruit cocktail juice (you can leave a little juice if you want--it makes the fruit salad sweeter and a little watery), throw in the chopped strawberry, add honey (as much as you want), and add in cool whip. Mix. Eat!
Pistachio, Almonds, Walnuts, or Pecans go well with this but it is best to stick to one type of nut.
Saturday, May 10, 2014
Breakfast Ideas
More quinoa! We love this superfood!! Part of a healthy diet includes good protein, healthy carbs, and yummy veggies. Here is what we did..
We cooked a standard sunny side up egg, roasted the mushrooms (we put a little crumbled bacon and salt in the the mushrooms), and cooked the cherry tomatoes. Cucumber salad was also included! These go well with quinoa (see our how to cook quinoa post)! Enjoy.

Wednesday, April 30, 2014
Brussels Sprouts and Mushroom Side

Ingredients:
1. 3-4 mushrooms
2. handful of brussels sprouts
3. clove of garlic
4. balsamic vinegar
5. capers and caper juice (optional)
How to Cook: Heat your pan, add olive oil. Throw in garlic and brussels sprouts. Let that cook for a bit. Once the brussels sprouts are soft, add mushrooms. Let this mixture cook for approx. 5 minutes. Once the vegetables are all soft (depending on your preference), add a splash of balsamic vinegar (maybe 1-2 tablespoons) and if you choose to, add the capers and a splash of caper juice. You do not want to add too much balsamic vinegar. For me, I find balsamic vinegar a bit too strong, but I like the acidity so I tend to add a lot. Simply adjust accordingly.
Quinoa Salad Ideas
I have been on this quinoa craze! Yes, I jumped on board and I love it! It has such great texture and super yummy. My trick for more flavor is to add chicken bouillon. Others make their quinoa with chicken stock. I haven't tried this yet because my chicken bouillon is working just fine for me. Anyhow, here are my salad ideas:


Either way salad is made, if you are trying to be healthy or slim down, your choice in dressing is everything!
Subscribe to:
Posts (Atom)